Showing posts with label Holiday. Show all posts

Sunday, May 3, 2020

Lemon Ricotta and Butternut Squash Crostini

Fun fact: I don't like the smell of raw butternut squash.  Ripe or not, when I smell raw butternut squash I notice a sour aroma.  But don't fear, the sour smells resolves with cooking. And the taste, oh the taste, when seasoned and sweetened, is warm and comforting.  One of my favoritebutternut squash dishes is the Autumn Squash Soup from Panera Bread.  I have yet to find or make a recipe that compares to Panera Bread's soup so I leave this soup to the Panera professionals.  If you have a great copycat recipe please send it my way.

Fun fact 2: My husband doesn't like butternut squash, but, and this is a big but (and I cannot lie), he loves this appetizer.


He specifically asked me to make it for our Quarantine Easter.  But a global f@cking pandemic prevented us from making this appetizer.  Our family is taking this physical distancing thing seriously.  I've only physically gone into a grocery store once since March 16 and that was because tons of items on my grocery pickup were unavailable, including butternut squash, lemon, and sage, and I wanted to see if the items were really "unavailable" or if the shoppers were just too overwhelmed / lazy / burnout / all of the above(?).  The short version of that story is many items I wanted were available when I went in to the store, but the items I needed to complete this dish were not.  So fast forward to last week when I was finally able to get my hands on lemon, sage, and a beautiful seeded baguette from my local health food store and we were in business.


I first had a variation of this appetizer served at a holiday hosted by my husband's aunt, a phenomenal cook.  We haven't shared Easter or Thanksgiving with that part of his family in a few years now, but this appetizer is still one of my absolute favorites (and clearly my husband's as well).  It is sweet and savory and when assembled is a gorgeous few bites of food.


It is also a great dish to let guests DIY.

Another reason I love this appetizer is the ricotta, butternut squash, and sage may be cooked the day before.  Just make sure you let the elements come to room temperature before serving.


Lemon Ricotta and Butternut Squash Crostini 

Printable Recipe

Ingredients:

  • 20 ounces of butternut squash, peeled, seeded, roughly chopped
  • 2 tablespoons extra virgin olive oil (EVOO), divided
  • 1 tablespoon brown sugar
  • 1/4 teaspoon nutmeg
  • 1 tablespoon butter
  • 1 sourdough baguette, sliced 3/4 inch thick
  • 3/4 cup ricotta cheese
  • Zest of one lemon
  • Salt and pepper to taste
Directions:
  1. Preheat oven to 425 degrees.  Toss butternut squash with 2 tablespoons EVOO, brown sugar, nutmeg, 1/2 teaspoon salt and 1/4 teaspoon pepper and transfer to parchment paper lined baking sheet.  Roast squash until soft, approximately 30 minutes, tossing butternut squash halfway through.  Once roasted, set squash aside *(see notes below).
  2. Meanwhile combine ricotta and lemon zest in small dish.  Add salt and pepper to taste.  Set aside.
  3. Heat butter in a medium skillet over medium-high heat. Once butter is melted add sage and cook until sage turns dark green and edges start to curl, approximately 2 minutes.  Transfer sage to plate lined with paper towels to absorb excess oil.  Reserve butter in skillet for next step.
  4. Once butternut squash has roasted, reduce heat to 350 degrees **.  Dip one side of bread in sage butter.  Transfer bread to baking sheet butter side up.  Toast bread until browned, approximately 10 mins.
  5. Layer toasted baguettes with lemon ricotta, butternut squash, and a piece of sage.  

      Or transfer the elements to pretty dishes and let your guests get their DIY on.


Notes:

* Taste before serving and season with additional salt and pepper to taste if needed.  I tend to like things salty, my husband not so much, so I tend to be conservative with the salt (IMHO).
** If you are bougie and have two ovens, use your second oven to toast buttered bread slices while the squash finishes roasting. 

Sunday, December 22, 2019

DIY Original Artwork Coffee Cups

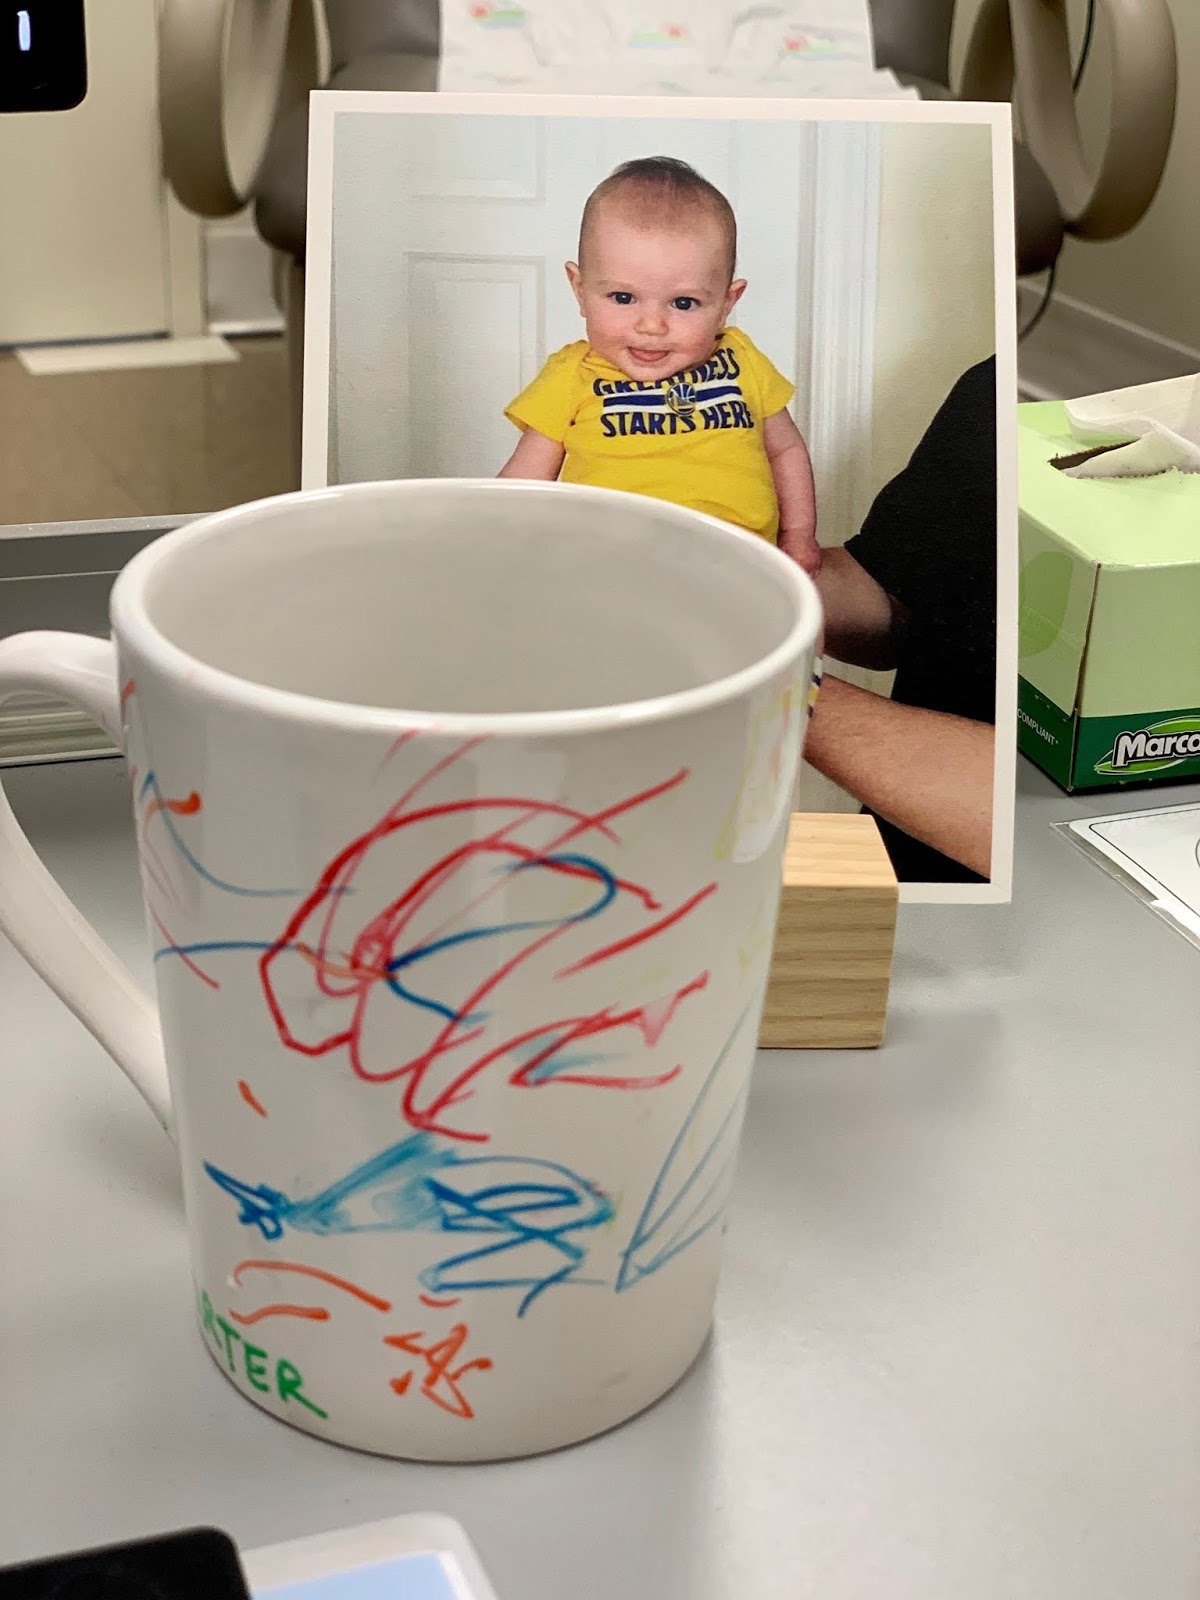
This is an easy last minute gift idea featuring original art work.  A few weeks  ago I went to a Winterland / Holiday event for children and this was one of the arts and craft projects featured.  It was hands down the most popular craft table.  Kids from ages 1-2 years old and up to grammar school were decorating cups and having a blast.  Clearly the little ones, like my son and younger, needed some adult supervision and some help opening the markers, holding the cups, and reminding them not to draw on the table, floors, each other etc.  I'm not sure if he or I had more fun (I probably did), but this cup is my new, most favorite thing.
I proudly drink out of it all day at work because every time I see it, I smile.  And everyone who sees it thinks it is the most special gift... BECAUSE IT IS!  I have an original piece of art from my 2 year old that can be used daily and washed without fear of ruining his scribble artwork.  This is such a great alternative to picture cups and will also last for years to come.  Plus, it is a fun project to do with your kids and only takes a little more than 24 hours before it is cured and ready for use so it is a great last minute gift idea.  It is also a budget friendly gift.
Acrylic paint markers and cups can be purchased at your local arts and craft store (think Michaels, etc.).  I purchased all my supplies on Amazon.  For an even better deal look for coffee cups at your local dollar store.

For this project you will need acrylic pens, ceramic coffee cups, and rubbing alcohol. And obvi some newspaper to cover your work space. I also recommend priming your markers so they are ready to use before sitting down to color, especially if you have a 2 year old like mine who is all about monkey see, monkey do. Once he saw me priming the markers he stopped wanting to color the cups and wanted to “boop” the table so we had to take a break and return to coloring the cups later.  And yes he still remembered and wanted to make one mark on the cup followed by a boop on the table, over and over...  While I chose coffee cups for this gift you can use any oven safe ceramic medium (plate, bowl, vase etc.). 
DIY Original Artwork Coffee Cups 

  • Acrylic paint pens / markers
  • Rubbing alcohol 
  • Ceramic mugs
  • Newspaper
Directions:
  1. Cover your workspace with newspaper
  2. Wipe cups with rubbing alcohol
  3. Prime markers so they are ready to draw with
  4. Once cups are dry let your child go crazy and color the cups to their liking.  (Why not color a cup with them?!)
  5. Let  cups sit undisturbed for 24 hours
  6. Bake for 40 minutes in a 300 degree oven or follow the directions recommended with the acrylic paint pen manufacture
  7. Let cool completely
Once cool wrap and gift or wash and use your original, one of a kind masterpiece.  

I also had fun making a cup and when my dad saw it he ranted and raved about it (he loves my original art) so I may consider giving him this cup I made.
Leave a comment with your finished project and Happy Holidays! 

Saturday, December 30, 2017

Leftover Ham, Broccoli, and Cheddar Quiche

I luvvv quiche.  Love, love, love.  Not only is it easy to make if you have a premade pie crust, but it is hearty, filling, and packed with protein!  It's also packed with calories, which has led me in the past to try and make a "healthy" or healthier quiche.  Many people use heavy cream in their quiches, but I prefer the texture and taste of half and half, which is slightly less dense, but still tastes rich.  And the half and half it saves you a few calories.  Just be careful when making a quiche sans half and half or heavy cream because when you mess with the dairy component, you mess with not only the taste, but the texture.  And no one wants a loose quiche.

This recipe is great if you have leftover ham and want to make something other than a split pea soup (it reminds me too much of baby poop these days).  And don't worry about if your ham is sweet.  I used leftover Honey Baked ham and this was a hit. 

You can serve quiche warm or room temperature.  I like to make quiche for dinner served warm with a nice side salad dressed in olive oil and vinegar and eat the leftovers for breakfast.  Today I paired the quiche with a side of bacon. 
Today IS National Bacon Day after all...

Yes there is a "holiday" for everything.  

Feel free to substitute the meet, veggies, and cheese to suit your favorite flavor profiles and let me know how it comes out.

Leftover Ham, Broccoli, and Cheddar Quiche
 Ingredients:
  • 1 tablespoon butter
  • 1/2 onion, white or yellow, diced
  • 1.5 cups leftover ham, diced
  • 1.5 cups broccoli, florets only, diced
  • 4 eggs
  • 1 cup half and half
  • 1/2 teaspoon salt
  • 1/2 teaspoon white pepper
  • 7 ounces mild cheddar cheese, shredded, divided
  • Frozen pie crust

Directions:
1. Preheat oven to 375 degrees.
2. Melt butter in medium saute pan over medium - high heat and saute onions until caramelized, about 5 minutes.
3. Meanwhile heat broccoli until just cooked, but still crisp.  I microwave for 30 seconds - 1 minute.
4. In a large bowl combine cooked broccoli, onions, and ham.  Set aside.
5. Beat eggs, half and half, salt and pepper until incorporated.  Set aside.
6. Fold in 6 ounces of cheese into ham and broccoli mixture and add mixture to pie crust.  Top with egg mixture and sprinkle remaining 1 ounce of cheese over everything. 
7. Cook for 45 minutes or until eggs are set and cheese is browned.
8. Let quiche rest for at least 10-20 minutes before serving. 

Thursday, November 16, 2017

Ebates for Holiday Shopping

The Holidays are coming and if you are like me than you probably do a lot of Holiday shopping.  So why not get a little something for yourself when getting things for others?  Enter Ebates.

I’ve talked about Ebates over and over again and if you have signed up for Ebates then you go girl (or boy… whatever).  But if you haven’t signed up yet, or if you have signed up, but “forget” to go to Ebates first before online shopping (hint, hint Mom) then shame on you!   So let me tell you about Ebates again. 

Ebates is a company that rewards you with cash back for shopping online.  Yes, it sounds too good to be true, but how it works per Ebates website is:
stores pay Ebates a commission for sending our members to shop at their websites.  Ebates then splits that commission with you, in the form of Cash Back.
There are tons of different stores participating with Ebates with varying cash back options.  And these cash back percentages change throughout the year (I've seen up to 20% cash back, right now up to 15%).  For example, It Cosmetics is offering 4% cash back right now.  If you read my last post (here) and decided to become an It Girl and purchase some of my favorite It Cosmetics products for yourself, then you would get 4% cash back for any purchase made through the Ebates website.  Basic math here: if you spend $100 you get 4% cash back or $4.  $4 to some may not seem like enough of an incentive to sign up for Ebates, but every purchase you make online adds up and free is free!  So maybe you are a baller instead and want to purchase the $1190 Soho Leather Gucci Disco Bag I've been dreaming of from Saks Fifth Avenue, who is offering 8% cash back on Ebates right now.  That is essentially $95 off the purchase of this gorgeous Gucci Disco Bag.  But $95 cash back doesn't entice you?  I forgot you're a baller.  You see my point...

Additionally, Ebates has a mobile app for on the go shopping and offers in store cash back options, which I've personally never tried, but plan to do next time I go to Buy Buy Baby.  I'll let you know how that works out.

I plan to do all my Holiday shopping though Ebates so mama can have a little spending money.  When you have a new baby, every penny counts including this Big Fat Check for $12.57 that I just received for my recent purchases through Ebates.

So have I convinced you yet to sign up for Ebates?  Use my referral link here and when you sign up and make a purchase you will get $10 free for joining and I will get $25 plus a chance to win $50,000!  And then after you have joined Ebates start referring all your friends so you too can get referral commission.  Everyone wins here.  Plus, if you sign up by November 19, every purchase you make through Ebates gives you an entry into a chance to win $500.  Now that would pay some of my Holiday bills, probably yours too... Fingers crossed!

Sunday, December 4, 2016

Ebates

Most people know about Ebates by now, but I still meet people who don't know about Ebates or use it for ALL their online shopping.

So for those of you who don't know Ebates offers cash back for all most of your online shopping.  I can't say all because there are still times that I will purchase something online and the site is not participating with Ebates (I'm talking specifically about Joyus...come on Ebates that site is the bomb!).

Ebates is super simple once you sign up here.  
1.  Click the link for the site you want to shop at.  Clearly today it's all about Nordies.
2. Once you click the desired shopping site a new tab will pop open and take you to Nordstrom's website.
3.  Shop as you usually would and get a percent back off your purchase.  In this case 6%.  

I swear it is that easy.  And then you get a big, fat check or money transferred to your PayPal account.
Right now when you sign up for Ebates you get $10 cash back and a chance to win a 2016 Toyota Highlander for doing nothing more then one extra click of your mouse before doing what you already did best.  Now you can do it better.  Seriously if you are not using Ebates to get cash back you are missing out on free money.  And while a $22.31 check may not seem like much, those checks add up.

Sunday, December 20, 2015

Video Tutorial DIY Glitter Wine Glasses

Often I get intense desires to not do anything remotely important, but create things, often with glitter. These last few days have been no exception.

You ever have this intense desire to cover things in glitter?
Uh, me either.  Now I'm just lying.

DIY with glitter is super easy and there are a number of other tutorials on how to glitterize your favorite items.  I've been making glitter dipped items for over a year and I'm going to share the method that I find works the best after a lot of trial and error.  Your glasses will shine like diamonds in the sky and you won't get glitter all over you once the item is cured.  Plus these glasses make great Holiday gifts or gifts for your favorite girlfriends.

In this video I show you not only how to make a glitter dipped wine glass, but also how to cover up a logo (yes I go to a lot of wine festivals).  If you don't have any wine glasses to glitterize you can get them cheap at a dollar store.  My local dollar store has both traditional and stemless wine glasses for $1 a piece.

Tutorial DIY Glitter Wine Glasses
You will need:
- Wine glasses of your choosing 
- Painters tape
- Mod Podge or as I like to call it "Modge Podge" in glossy finish 
- Sponge brush or other small painting brush
- Fine glitter